Painting skirting boards and door frames: the clean-edge guide
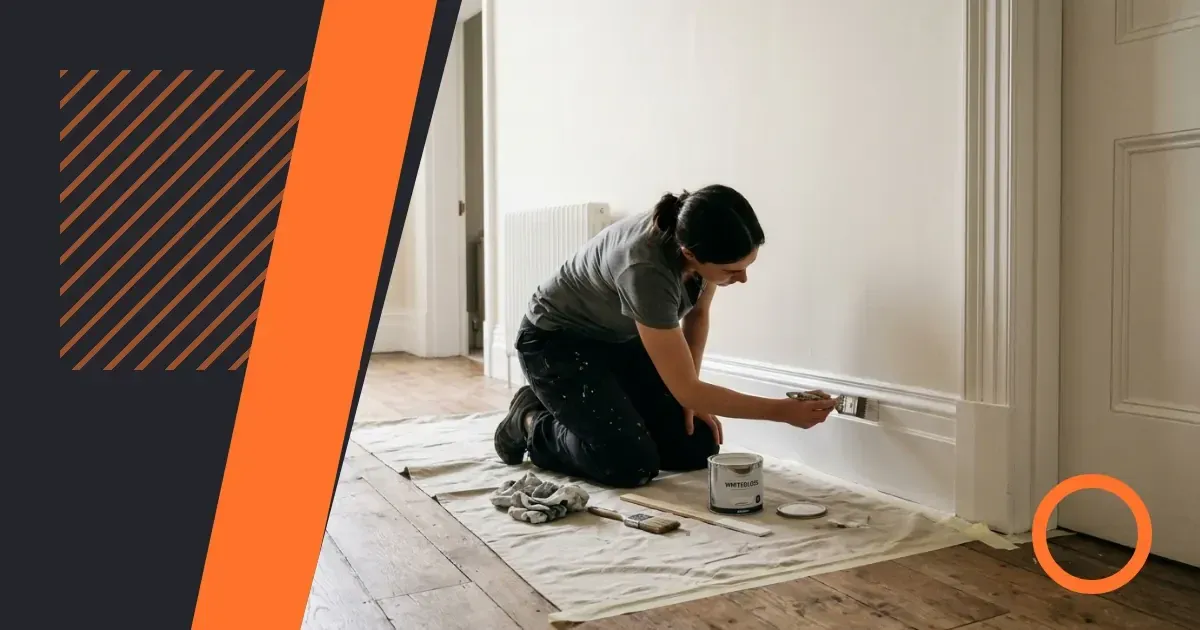 Save
Getting painting skirting boards right comes down to two things: preparation and patience. Rush either, and you end up with lumpy paint, ragged edges or brush marks that catch the light. This guide walks through every stage – from filling and sanding to cutting in along the wall – so the finished result looks deliberate rather than accidental. Whether you are freshening up one room or repainting woodwork throughout the house, the principles are the same. Nyde has gathered the practical detail so you can work through it in order.
Preparation before painting woodwork
Prep is the part most people cut short, and it shows. Old paint builds up in layers over the years, softening the crispness of moulding profiles. A quick rub with fine-grit sandpaper flattens any ridges and gives the new coat something to grip. Wipe the surface down with a damp cloth afterwards and let it dry completely before you open a tin.
Fill any dents, nail holes or cracks with a flexible decorator's filler rather than a hard powder filler. Woodwork moves slightly with temperature, and a rigid fill will crack back out. Once dry, sand the filled area smooth and dust off again. Running your hand along the board tells you more than your eyes do at this stage.
Stripping old paint when necessary
Most skirting boards do not need stripping – a good key from sanding is enough. Where paint has built up to the point that the profile is almost lost, a heat gun or chemical stripper gets you back to bare wood. Work in small sections with a heat gun and keep the nozzle moving to avoid scorching. Chemical stripper needs time to work; follow the tin, neutralise properly and let the wood dry for a full day before painting.
Masking and protecting floors
Low-tack masking tape along the top edge of the skirting protects the wall from brush slips. Press it down firmly with a fingernail – loose tape lets paint creep underneath. For floors, lay a canvas dust sheet rather than plastic sheeting; plastic moves underfoot and can cause a fall. Push the edge of the sheet right up to the base of the board so drips land on it, not on the floor.
Choosing the right paint and finish
Skirting boards and door frames take more knocks than walls, so the paint needs to be durable. Satinwood and eggshell give a low-sheen finish that wipes clean and holds up well. Traditional oil-based gloss is harder-wearing still, but it yellows over time in rooms with little natural light and takes longer to dry between coats. Water-based gloss and satinwood dry faster, remain white for longer and are easier to clean from brushes.
The table below sets out the main finish options side by side.
| Finish | Sheen level | Durability | Drying speed |
|---|---|---|---|
| Oil-based gloss | High | Very high | Slow |
| Water-based gloss | High | High | Fast |
| Satinwood | Medium | High | Fast |
| Eggshell | Low | Medium–high | Fast |
Good to know: if you are painting over bare wood for the first time, apply a coat of primer or undercoat first. It seals the grain, improves adhesion and means the topcoat covers evenly without needing an extra layer.
Brushes and tools for a neat result
A cutting-in brush – angled, typically about fifty millimetres wide – is the most useful tool for painting woodwork. The angled tip gives you control along the top edge of the skirting board where it meets the wall. For door frames and architrave, a narrower brush handles the inner edges without loading too much paint onto a rebate.
Avoid foam rollers on woodwork: they create a stippled texture that looks wrong against a smooth wall. A good-quality synthetic brush for water-based paints, or a natural bristle brush for oil-based, holds paint well and lays it down without leaving thick tracks. Cheap brushes shed bristles into wet paint – not easy to fix without starting again.
One useful extra: the paint shield
A paint shield (sometimes called a paint guard) is a flat metal or plastic blade held against the floor or wall while you paint. It stops the brush touching the surface below. It works well on smooth floors, less well on thick carpet where the pile pushes it away from the skirting face. As an alternative, run a strip of low-tack tape along the floor edge of the skirting for the same protection.
The painting technique step by step
- Stir the paint thoroughly before starting, even if it looks even. Pigment settles at the bottom and an unstirred tin produces an uneven sheen once dry.
- Load the brush to roughly a third of the bristle length. Too much paint sags; too little and you get drag marks. Tap the brush lightly against the inside of the tin rather than wiping it across the rim, which removes too much.
- Start painting at one end of the board, working along the length in smooth strokes in the direction of any grain. Keep a wet edge – work quickly enough that you are always joining fresh paint to paint that has not yet dried.
- Cut in along the top edge last, using the angled brush held almost flat to the wall. Move slowly and keep the bristle tips doing the work, not the ferrule.
- Let the first coat dry fully before assessing. Most woodwork paints need a light sand between coats with fine-grit paper. Wipe the dust off, then apply the second coat in the same way.
- Remove masking tape while the final coat is still slightly tacky, not bone dry. Pulling tape from fully dry paint risks lifting the edge of the new coat with it.
Painting door frames and architrave
Door frames have more angles and less flat surface than skirting, which makes the cut-in step more demanding. Work the narrow inner edge of the architrave first, then the face, so any overlap lands on a surface you will paint next rather than one you have finished. Keep a dry brush nearby – if paint pools in a corner, feather it out immediately before it sags into a drip.
For painted hinges or ironmongery you want to protect, a small piece of masking tape wrapped around each one takes a minute to apply and saves a much longer clean-up afterwards. It is worth doing even when you feel confident with the brush.
If you are repainting a door at the same time, paint the frame before the door itself so any light overspray from the door face does not land on a finished frame. The article on accent walls and feature walls covers the broader question of how colour on woodwork and walls interact when you are changing a room's scheme.
Getting a clean edge where woodwork meets wall
This is the detail that separates a professional finish from a home job. The key is not speed – it is keeping the brush loaded consistently and maintaining light, even pressure throughout the stroke. An overloaded brush at the start of a stroke deposits too much paint; an underloaded one at the end drags and pulls. Both leave a wavy line.
If your walls are already painted and you cut over them slightly, touch in with the wall colour once the woodwork is fully dry. A small artist's brush gives the control needed for this. It takes five minutes and makes the edge look intentional. For rooms where the wall and woodwork colours are very similar, the tolerance is wider; for high contrast – dark walls, white gloss – the cut-in line needs to be as straight as you can make it.
Worth remembering: natural light moves through the day, and a line that looked straight under artificial light may show up differently in morning sun. Check your finished edge the following day in daylight before removing the masking tape from the wall above.
Common problems and how to correct them
Brush marks visible in the dried paint
Brush marks usually mean the paint was applied too thickly, the brush was overloaded, or the coat was disturbed after it began to set. Let the coat dry fully, sand lightly with fine-grit paper, wipe clean and apply a thinner coat. Water-based paints are more forgiving here: because they dry faster, the window for laying off (smoothing the final stroke) is shorter but the marks are easier to sand back.
Paint creeping under masking tape
Almost always caused by tape that was not pressed down firmly enough, or tape left on so long the paint dried rigid underneath it. Press tape edges down with a fingernail or a putty knife before you start painting, and remove it as described above. If paint has crept under, let it dry and score along the tape line with a sharp craft knife before peeling, which keeps the edge clean.
Sagging or dripping paint
Sags form when too much paint is applied in one pass, especially on vertical faces. If you catch a sag while the paint is still wet, brush it out immediately with a lightly loaded brush. If it has dried, sand it back carefully and repaint. On door-frame profiles, a smaller brush with less paint on it prevents the issue; on flat skirting, a steady pace and consistent loading are enough.
Giving a room's woodwork a coherent look
Skirting boards, door frames and window architrave all read together as the room's trim. Painting them the same colour in the same finish makes the room feel considered; mixing finishes between them creates a distraction. If you are unsure whether the existing skirting colour will still suit after repainting a wall, hold a painted sample card against the dry wall before committing to a full tin. The guide on making a small bedroom feel larger touches on how light trim colours affect the perception of space, which is worth reading alongside this one if you are redecorating a room from scratch.
Making a start this week
Painting skirting boards is a straightforward weekend job once the materials are ready and the surface is prepared. The steps below get you to the point of painting without the usual mid-job scramble.
- Run your hand along every board in the room and mark any dents, cracks or loose sections with masking tape before you buy filler.
- Pick up a small tin of whichever finish you are testing before committing to a full quantity – sheen levels look different in every room.
- Set the dust sheet and masking tape the evening before you plan to paint, so the job starts with everything already in place.
- Sand lightly between your first and second coat, even when the first coat looks smooth – it makes the final result noticeably better.
Download PDF: Skirting boards and door frames: painting checklist PDF, 31 KB
Further reading
Frequently asked questions
How do you paint skirting boards without getting paint on the wall?
Use low-tack masking tape along the top edge of the skirting, pressed down firmly with a fingernail or putty knife so paint cannot creep underneath. Cut in with an angled brush held almost parallel to the wall, letting the bristle tips do the work. Remove the tape while the final coat is slightly tacky, not fully dry, to avoid pulling the paint edge with it.
What is the best way to get a smooth finish when painting door frames?
Work the narrow inner edges first, then the face, so any overlap lands on a surface you are about to paint. Keep the brush loaded consistently and use a light laying-off stroke at the end of each section to smooth the surface before the paint begins to set. If brush marks appear once dry, sand lightly with fine-grit paper, wipe clean and apply a thinner second coat.
How many coats of paint does woodwork need?
Bare wood needs a primer or undercoat first, followed by two topcoats. Previously painted woodwork in good condition usually needs two topcoats, with a light sand between them. A second coat over a thin or uneven first coat gives a more even sheen and better durability than trying to achieve full coverage in one pass.